
Share this article


It’s time for the second post in our series detailing new features in Cardhop 1.1. Today, we’ll cover a frequently requested feature: templates.
Cardhop’s templates provide an efficient way to customize new contacts. Do you prefer to give all of your contacts a nickname? Then set the template to always show the Nickname field when making a new contact. Do you work in a large company? In that case, you will likely find it useful to add the Job Title and Department fields to the default new contact view.
And what about if you find your contacts’ Twitter accounts more important then their mobile phone numbers? Feel free to delete the mobile field and add the Twitter field instead — it’ll save you from having to do this each time you add a new contact.
Let’s walk through configuring Cardhop’s template settings.
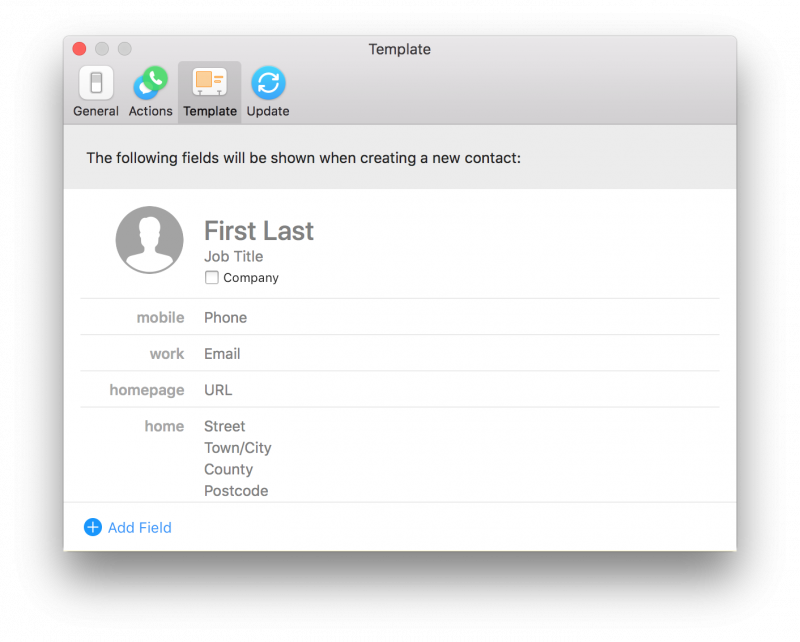
When you open Cardhop’s Template preferences you’ll see a preview of the default template Cardhop uses for new contacts. It looks like this:
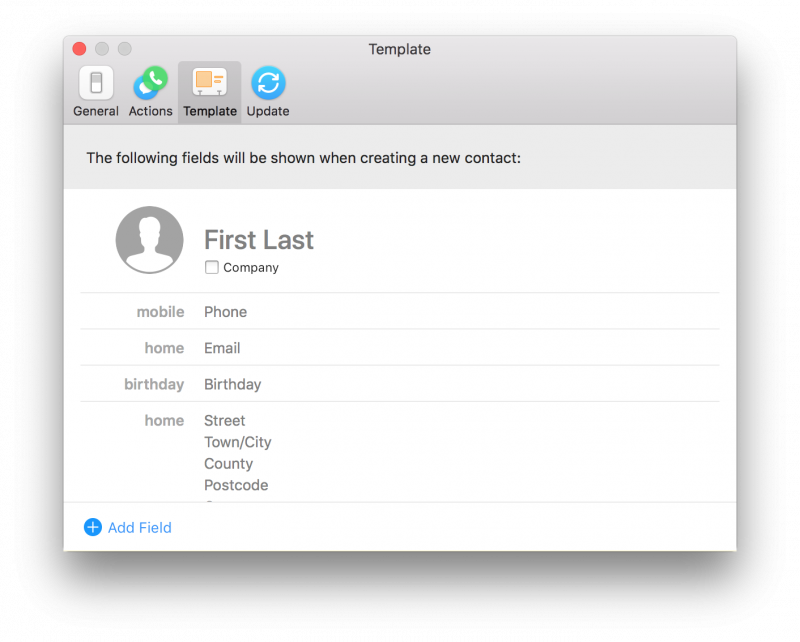
Whenever you create a new contact you’ll see these fields.
Let’s imagine that you primarily use Cardhop to create new business contacts. In this use case, having a home email address may not be particularly relevant. So click the home field to change it’s label to ‘work’ instead.
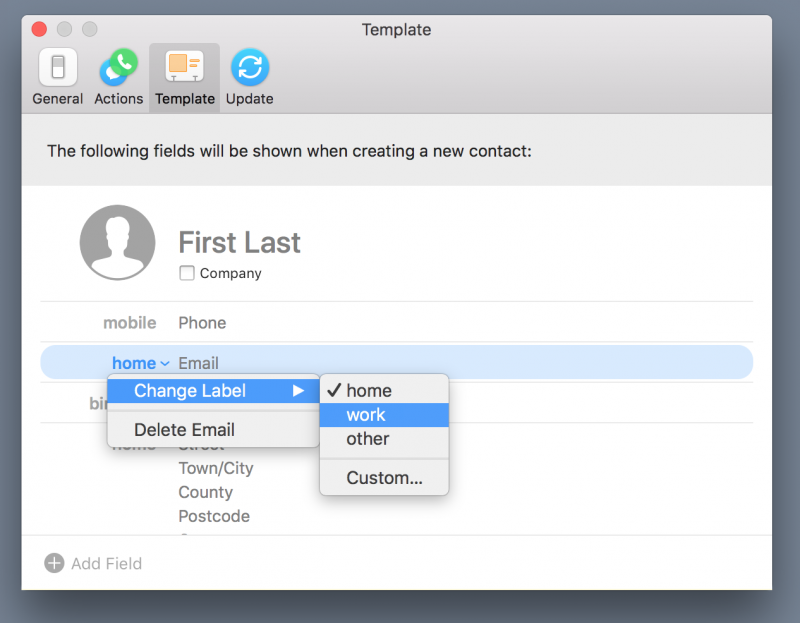
Now, when you create a new contact and specify an email address, it will be added as a ‘work’ email.
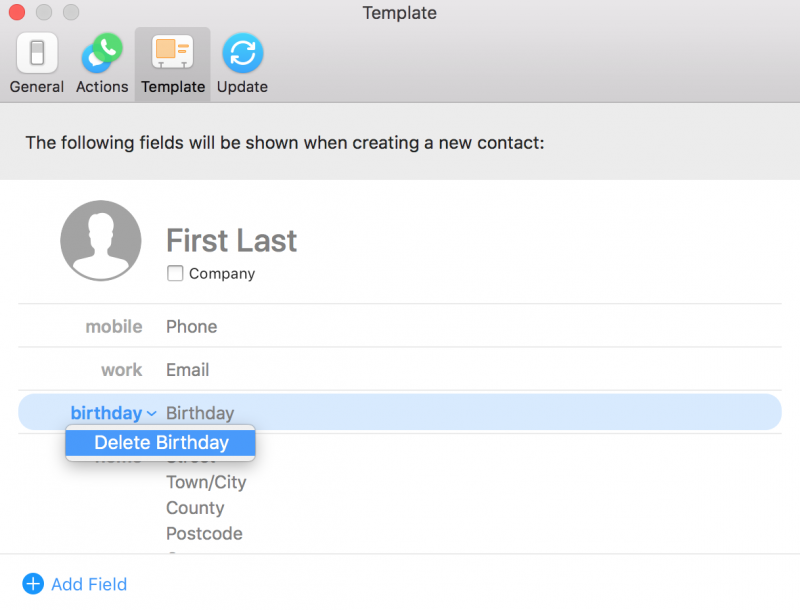
So far so good, but what if you don’t feel the need to remember your business contacts’ birthdays? Back in Preferences > Template, you can click the ‘birthday’ field and delete it. You won’t see this field any more when making new contacts.
Instead, perhaps you’d find it more convenient to be able to enter your co-worker’s job title? And let’s say your organization likes to link a URL to its employees, so we’ll configure Cardhop to add these new fields to the template. Just click the (+) Add Field button to the lower-left of the Template view to add these fields to the template.
After adding these fields, your template will appear like this:
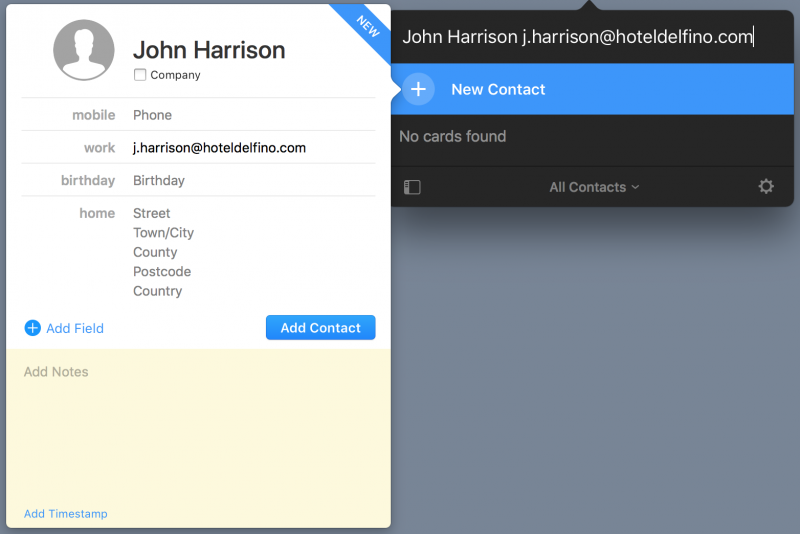
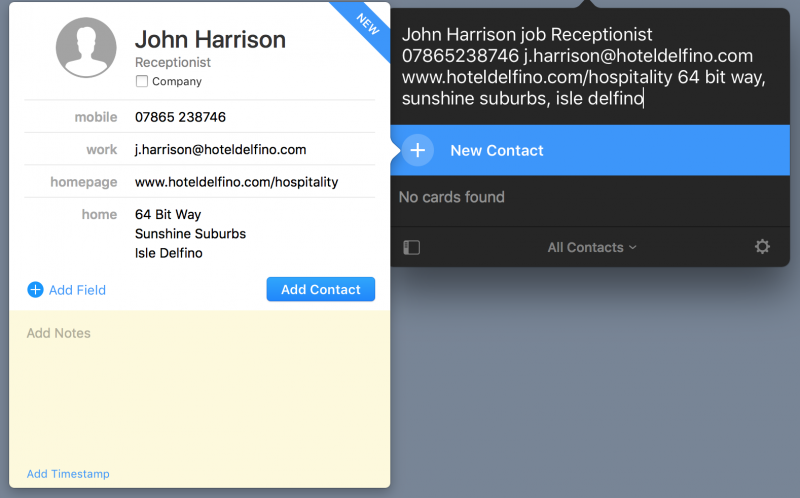
When you close Cardhop’s preferences, you can create a new contact directly from the text parser and all of these fields will appear right away. In fact, you can enter all of this information right from the keyboard — just type your contact’s details into the text parser and Cardhop will do the rest for you!
As you can see, the template preference is a flexible way to adapt Cardhop to your existing workflow. Please feel free to refer to Cardhop’s Help Book for further details about the template feature.
Be sure to revisit our blog next week, when we’ll be discussing another one of the new features added to Cardhop 1.1. See you soon!